
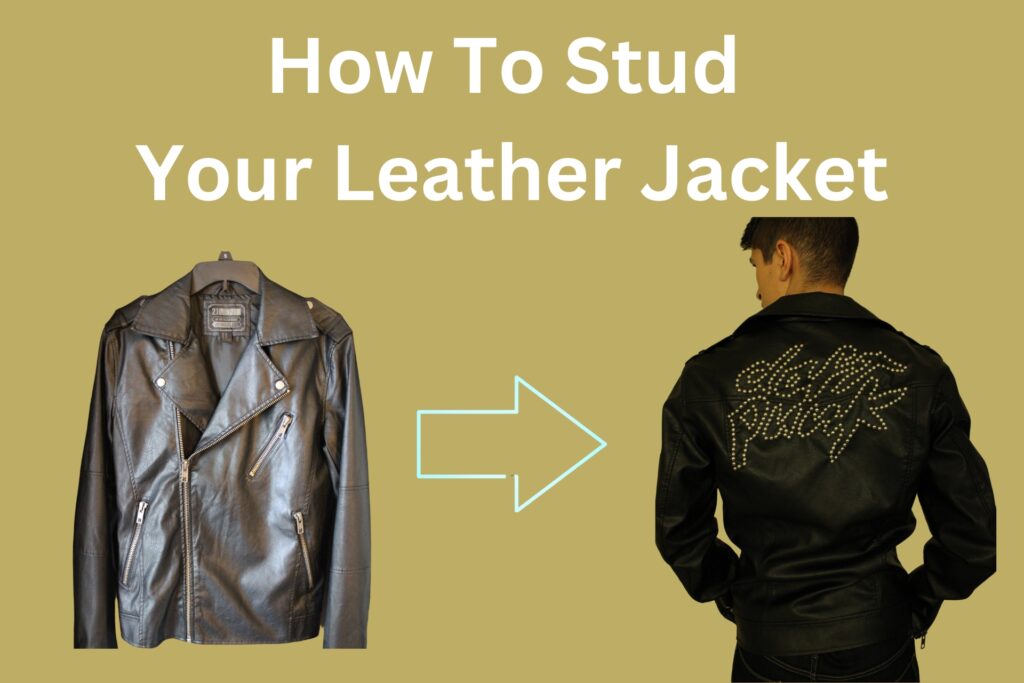
Are you looking to add a little edge to your leather jacket? Studs are a great way to do it. But putting them on can be tricky, especially if you’ve never done it before. Fear not! I’m here to walk you through the process step by step.
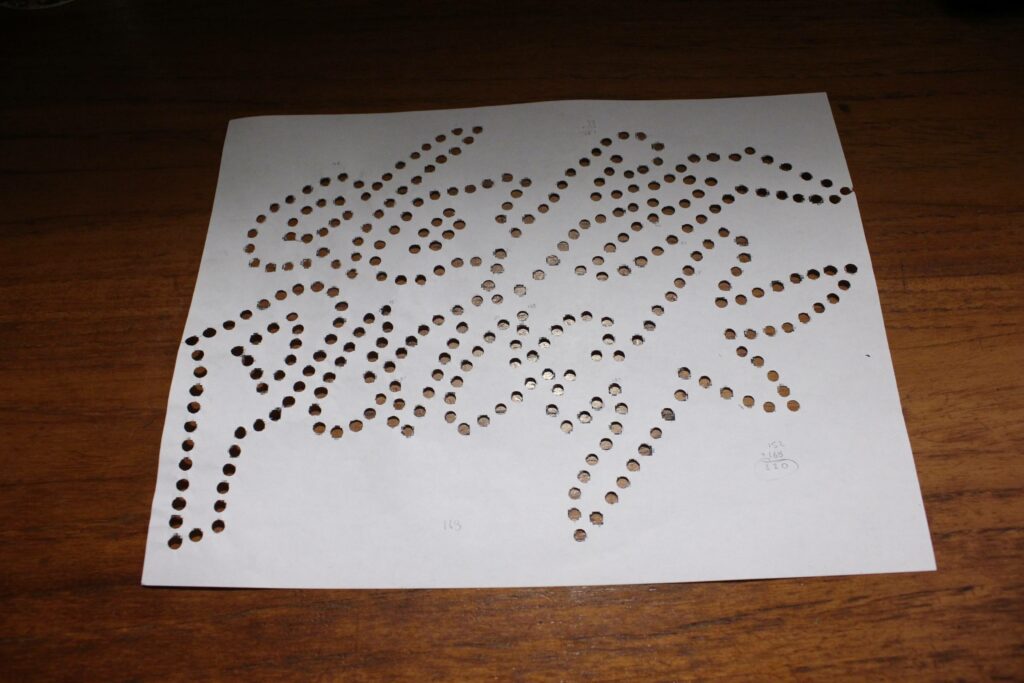
Before you start studding your jacket, it’s a good idea to design a stencil. This will help you determine the placement of the studs and make sure they’re evenly spaced. You can use a piece of cardboard or scrap paper to create your stencil. Once you have your stencil, you can start placing the studs onto your jacket.
Selecting the Appropriate Studs
Selecting the right studs is perhaps the most crucial thing in the entire process. Here are some factors to consider when choosing the appropriate studs for your leather jacket.
Size and Shape
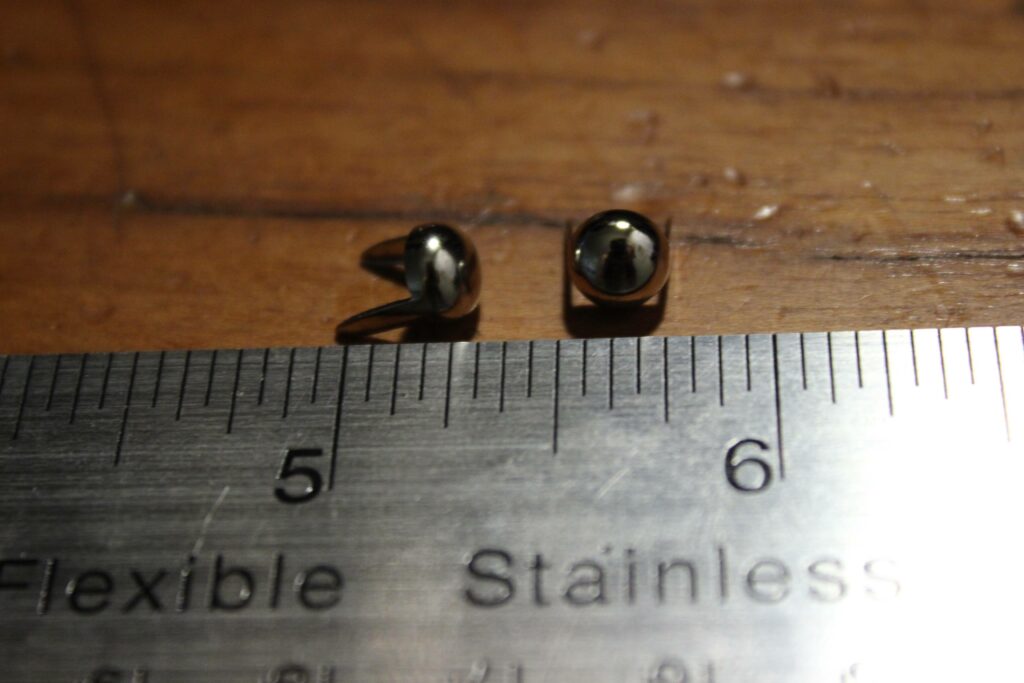
The size and shape of the studs you choose will depend on the look you want to achieve. Small studs can give your jacket a subtle edge, while larger studs can create a bolder statement.
When selecting studs, it’s important to consider the shape as well. Round studs are classic and versatile, while pyramid studs can give your jacket a more punk rock edge.
Material
The material of the studs is also important to consider. Metal studs are the most common and come in a variety of finishes, including silver, gold, and black.
If you’re looking for a more unique look, consider studs made from other materials such as glass, plastic, or even wood. Keep in mind that non-metallic studs may not be as durable as metal studs and may be more prone to falling off or breaking.
It’s also important to choose the ones that are appropriate for the weight and thickness of your leather jacket. Studs that are too heavy or too long may not stay in place properly and can damage the leather.
By considering the size, shape, and material of the studs, you can select the appropriate studs for your leather jacket and achieve the look you want.
Tools Needed for Stud Placement
When it comes to putting studs on a leather jacket, you’ll need a few essential tools to get the job done right. Here are the tools that I recommend:
1. Leather Punch
A leather punch is a must-have tool for any leatherworking project. It’s used to punch holes in the leather where you want to place the studs. There are several different types of leather punches available, but I recommend getting this one from Amazon as it has multiple punch sizes so that you can use it for different stud sizes.
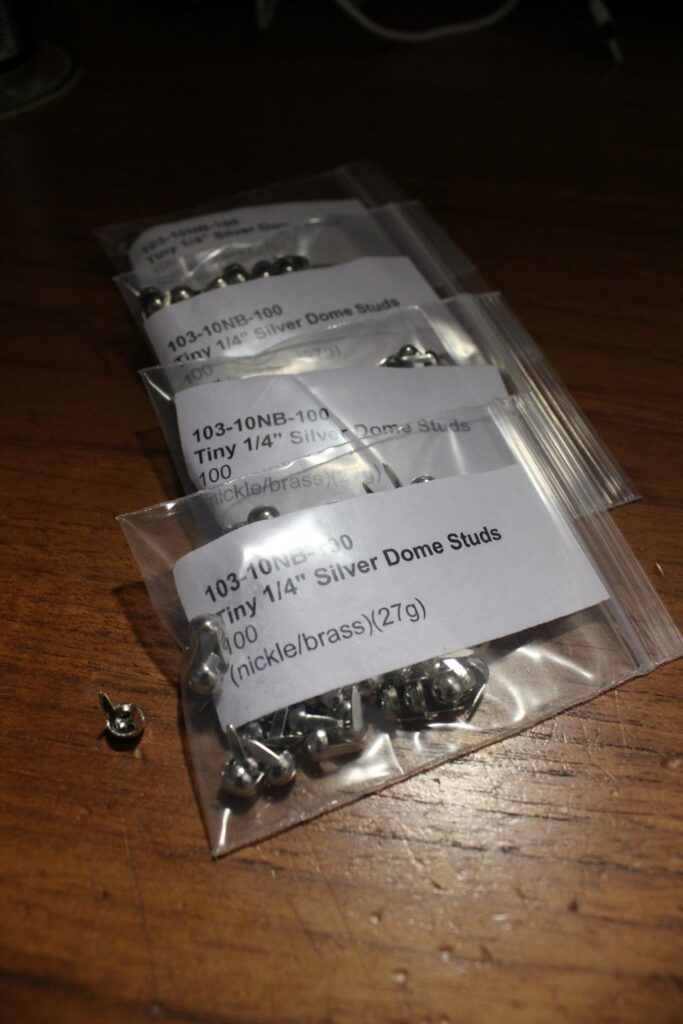
2. Studs
Of course, you’ll need the studs themselves. Studs come in different shapes, sizes, and styles, so choose the ones that best fit your jacket’s design. Flat-backed studs are the most common type and are easy to attach with bonding glue.
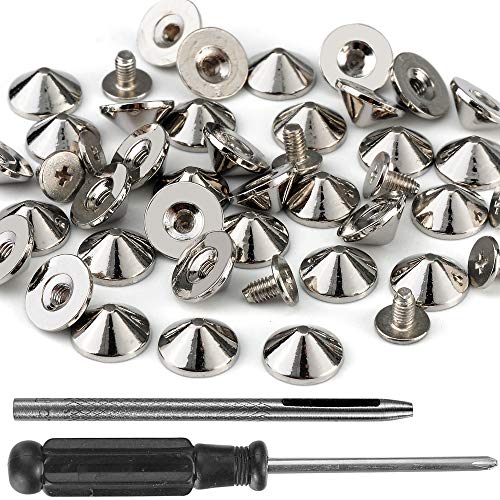
- ➤ Durable Material —- Zinc Alloy Spikes with Iron Screws,Each Spike is Smooth with a…
- ➤ Size and Color —- Spike Height:4.7mm (3/16″), Spike Base Diameter:10mm (25/64″),…
- ➤ Package Contains —- 100 Sets Silver Cone Spikes with Screws and Installation…
- ➤ Easy to Use —- These are Pretty Sharp and You Will Love Them! Just Need Punch a Hole…
3. Awl or Plier Set
An awl or plier set is used to insert the studs into the punched-out holes. The awl is a pointed tool that makes it easy to push the stud through the leather. A plier set, on the other hand, has a special tool that helps you grip and insert the stud. Either one will suffice for putting studs on your leather jacket.

- WOODEN HANDLE AWL: Our craft piercing tool is rust-resistant and can be used for punching,…
- CRAFT AWL: This handy needle tool can help you create your next woodworking masterpiece….
- AWL PUNCH: The hand-held tool features a steel blade through the grip and is fastened to a…
- MARKING AWL: It only takes a few seconds to use an awl scratch to make a starting point…
4. Stencil
While not technically a tool, a stencil is a helpful accessory for placing the studs evenly and in the right spots. You can create a stencil by using a piece of cardboard or scrap paper to map out the placement of the studs before you start punching holes in the leather.
5. Bonding Glue
Bonding glue is used to attach flat-backed studs to the leather. Be sure to choose a glue that is strong enough to hold the studs in place but won’t damage the leather. This one is my favorite.
With these tools on hand, you’ll be ready to start placing studs on your leather jacket in no time!
Step-by-Step Guide to Putting Studs on a Leather Jacket
Here are the steps that you need to go through in order to attach studs to your leather jacket.
1. Marking the Jacket
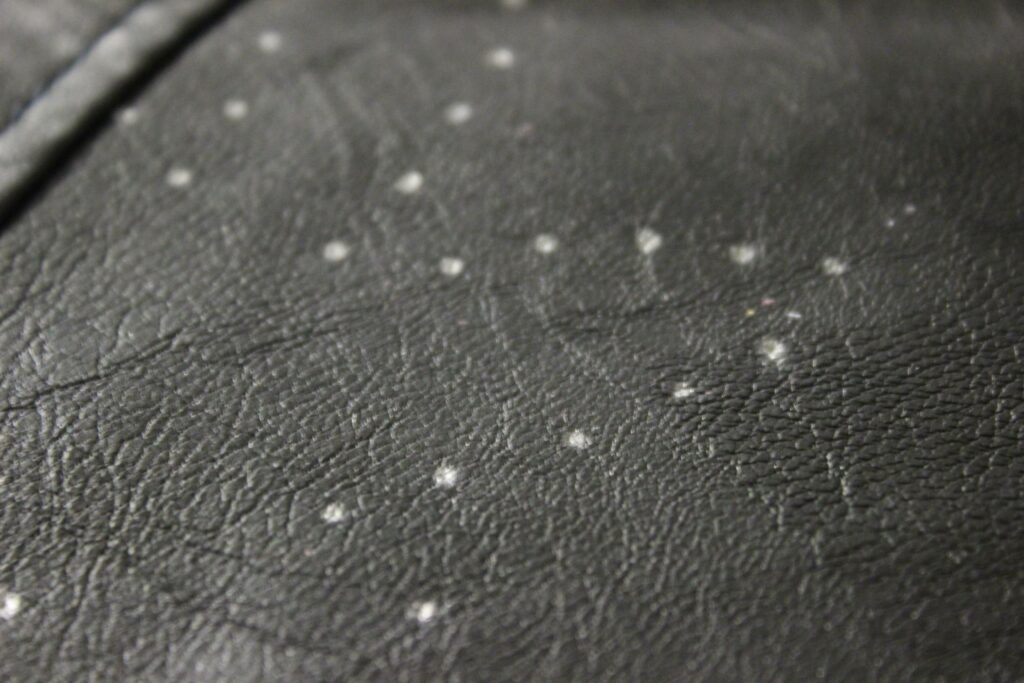
Before starting, I gather the necessary materials: studs, a leather jacket, a sharpie or other marking tool, and an awl or leather punch. I make sure that the studs and the leather are compatible to avoid any damage.
Next, I determine where I want each stud to go and mark those spots on the jacket with a sharpie. I use a ruler to ensure that the studs are evenly spaced.
2. Attaching the Studs
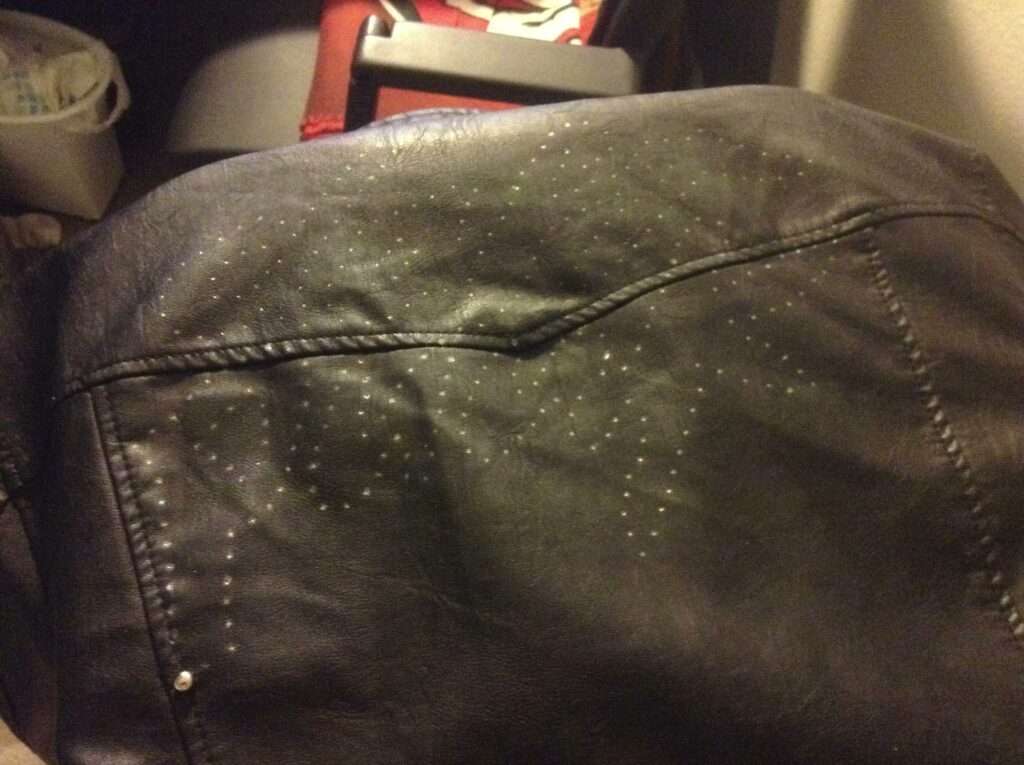
Now, take your awl or leather punch. It’s like a magic wand that helps you make holes. Put the pointy end of the awl where you made those marks. Press down gently and twist it just a little bit. This will make a small hole in the jacket. It’s like digging a tiny hole in the sand with your finger.
Remember, you’re not making big holes, just small ones. You don’t want to tear your jacket. So, don’t press too hard or twist too much. Just like you’re making a small dot with a pencil.
Go to all the marked spots one by one and make these small holes. Take your time and make sure you’re doing it gently. It’s like putting little windows in your jacket for the studs to peek through.
3. Securing the Studs
To ensure that the studs stay in place, I use pliers to bend the prongs inward once more. This way, the studs are less likely to come loose or fall off.
I also check the inside of the jacket to make sure that the prongs are not sticking out and potentially scratching me or others. If any prongs are sticking out, I use the pliers to bend them inward until they are flush with the inside of the jacket.
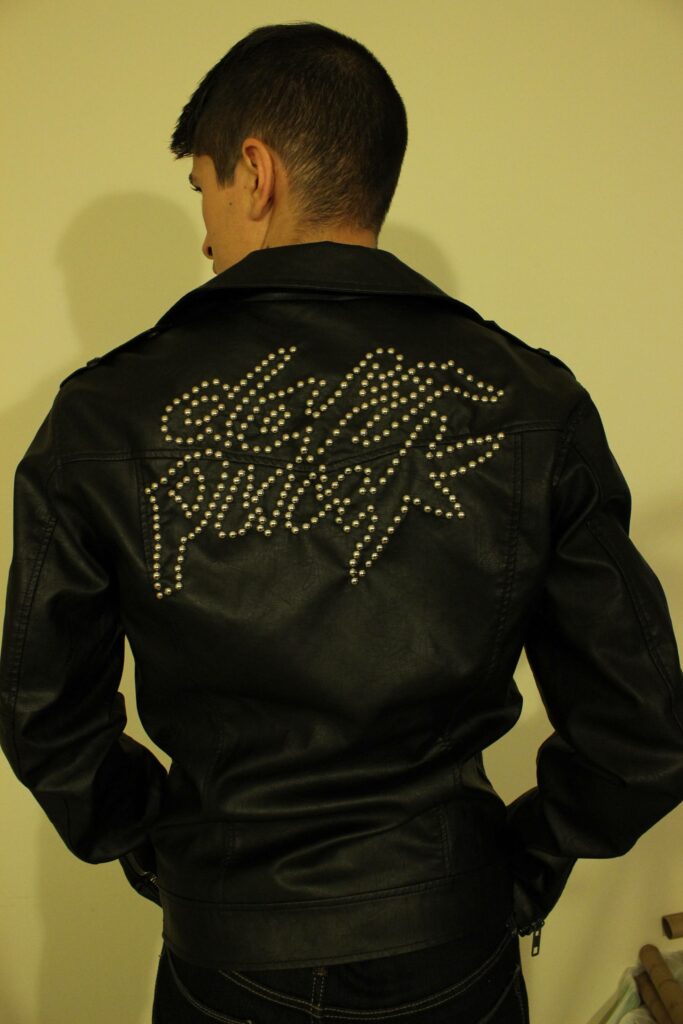
That’s it! With these simple steps, you can easily add studs to your leather jacket and give it a unique and edgy look.
Tips and Tricks for Stud Placement
When it comes to putting studs on a leather jacket, there are a few tips and tricks that I have learned over the years that can help you achieve a professional-looking result. Here are some of my best tips for stud placement:
- Plan your design beforehand: Before you start putting studs on your jacket, it’s a good idea to plan out your design. You can use a piece of paper or a computer program to sketch out where you want your studs to go. This will help you avoid mistakes and ensure that your studs are evenly spaced.
- Use a ruler or measuring tape: To make sure that your studs are evenly spaced, use a ruler or measuring tape to mark where each stud should go. This will help you avoid crooked or unevenly spaced studs.
- Start from the center: When putting studs on a jacket, it’s a good idea to start from the center and work your way out. This will help you maintain symmetry and avoid mistakes.
- Use a stud setter tool: A stud setter tool can make it much easier to insert studs into your jacket. This tool will help you push the prongs of the stud through the leather and secure them in place. You can purchase a stud setter tool at most craft stores or online.
- Be patient: Putting studs on a jacket can be a time-consuming process, especially if you are doing a complex design. Take your time and be patient, and you will end up with a jacket that looks great.
Conclusion
Incorporating studs into your leather jacket opens the door to personalized style and creative expression. By following the simple yet rewarding process outlined in this article, you can confidently transform a regular jacket into a unique fashion statement that reflects your individuality.
The act of adding studs isn’t just a DIY task – it’s an opportunity to showcase your personal flair and turn an ordinary garment into a symbol of your distinctive taste. So, whether you’re aiming for edgy or elegant, the journey of stud placement is an adventure that yields a one-of-a-kind result.

My name is Alex Higson and I am the founder of Magic Of Clothes. I have worked in the fashion industry for many years, and clothes and style are a huge part of my life.