
Removing patches from a leather jacket can be a daunting task, especially if you’re not sure where to start. As someone who has gone through this process multiple times, I can assure you that it’s not as difficult as it may seem. With the right tools and techniques, you can remove patches from your leather jacket without damaging the leather.
Leather is a delicate material, and it’s easy to damage it if you’re not careful. Before you start removing the patches, make sure you have all the necessary tools and supplies.

Materials Required
- Seam Ripper – I recommend this one on Amazon.
- Scissors – Any decent pair of scissors will work.
- Adhesive Remover – Use the Perco’s scratch-free adhesive remover.
- Leather Balm – Fortivo’s leather balm is by far the best one on the market.
Why Remove Patches?
Patches can be a great way to personalize your jacket and show off your unique style, but sometimes they can become outdated or no longer relevant to your interests. In those cases, it’s important to know how to remove patches from a leather jacket without damaging the leather.
Removing patches can also be necessary if you want to sell or donate your jacket. Some buyers or organizations may not want a jacket with patches already attached, so it’s important to be able to remove them safely and effectively.
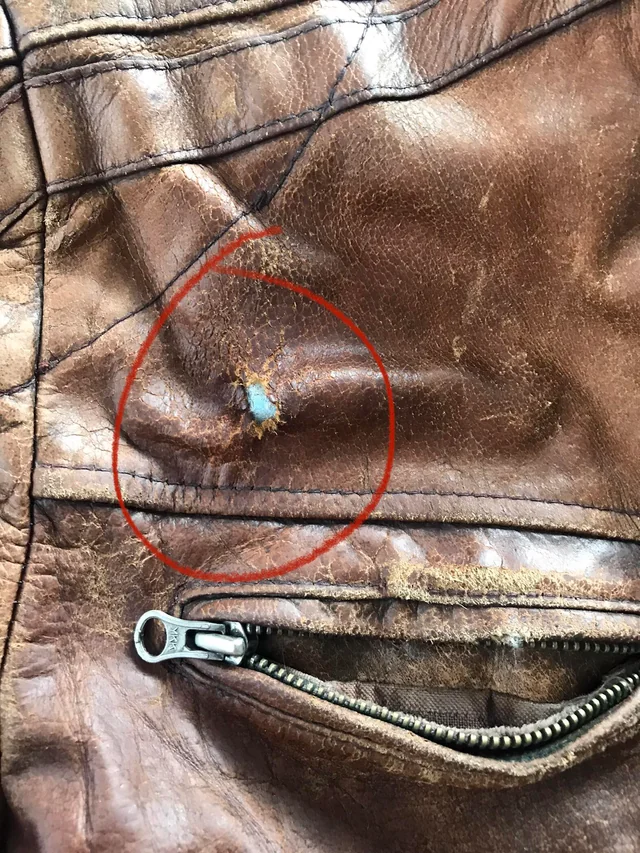
Another reason to remove patches is if they are causing damage to the leather. If a patch has been sewn on too tightly or with the wrong type of thread, it can cause the leather to tear or become weakened. In these cases, it’s best to remove the patch before any further damage can occur.
Step-by-Step Guide to Remove Patches From A Leather Jacket
Here is my detailed guide for removing patches from a leather jacket:
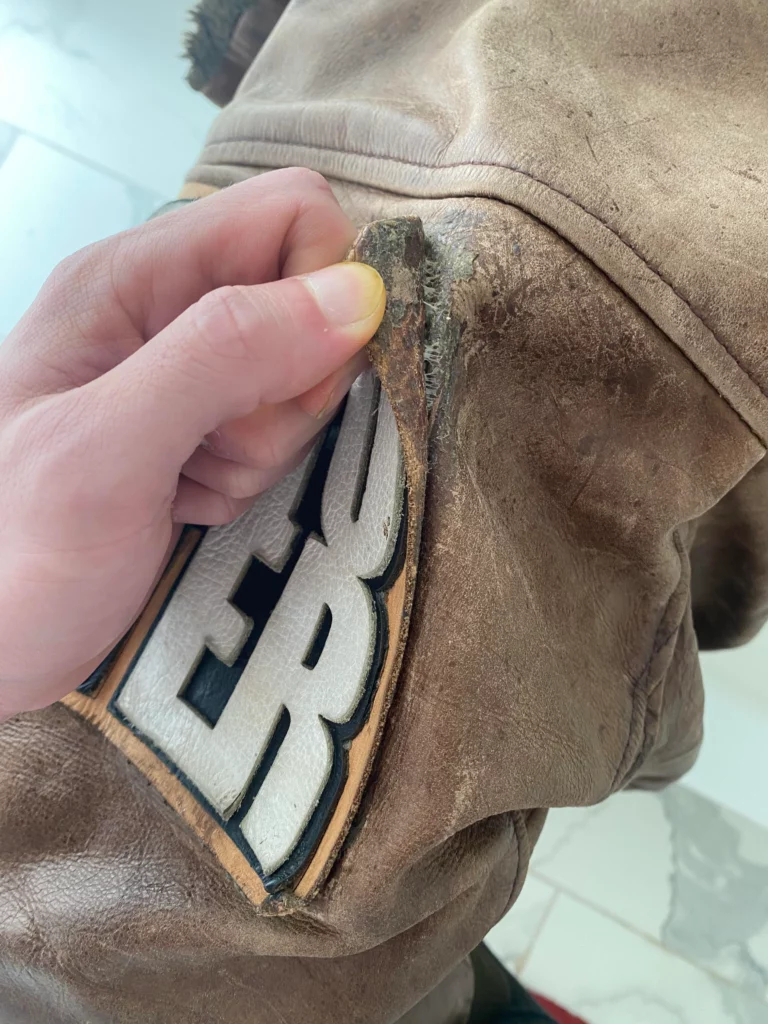
1. Check how the patch has been attached to the leather
Patches can be attached to your leather jacket by either sewing or by using an adhesive such as glue. This is important to determine because the removal process will largely depend on the attachment style.
If the patch has been sewn onto the leather, you can simply use a seam ripper to pull the threads apart, slowly and carefully. Skip the next two points in that case.
However, if the patch has been glued onto the leather, you will require an adhesive remover. Follow the next two steps carefully.

2. Apply the Adhesive Remover
Apply a small amount of adhesive remover to the patch and let it sit for a few minutes. The adhesive remover will loosen the glue and make it easier to remove the patch. Be sure to use a plastic scraper to avoid scratching the leather.

- The Fighter Duo: Better two than one. This fighter duo combines the quick and effective…
- Perfect DIY Bundle: The bundle pack allows you to keep a fool-proof backup with you while…
- This Plastic Scraper is constructed of high-quality hot injection molded plastic that…
- Safe Surface Combo: Both, Perco adhesive remover as well as razor blade scraper as safe…
3. Gently Peel Off the Patch and clean the area
After a few minutes, gently peel off the patch. Be careful not to pull too hard as this can damage the leather. If the patch is still difficult to remove, apply more adhesive remover and wait a few more minutes.
Once the patch is removed, clean the area with a soft cloth and warm water. Be sure to remove any remaining adhesive remover as this can damage the leather over time.
4. Condition the Leather
After cleaning, it is important to condition the leather to keep it soft and supple. Apply a small amount of leather balm to the area and buff with a soft cloth. This will help protect the leather from future damage.

- Leather Recoloring Balm. Breathe new life into your cherished leather goods with our…
- Leather Scratch Remover. Our reliable leather couch color restorer eliminates wear and…
- Leather Color Restorer. Our potent leather stain restorer helps you get rid of unsightly…
- Leather Color Restorer for Couches. Specially formulated to treat scratches, recolor, and…
Using a quality leather balm will also ensure that the minor scratches that will happen due to the removal of the patch get treated immediately.
Common Mistakes to Avoid
Here are a few common mistakes that people make that can end up damaging the jacket.
Rushing the Process
One of the biggest mistakes people make is rushing the patch removal process. They try to remove the patch too quickly, which can cause the leather to tear or become damaged. It’s important to take your time and be patient when removing patches from a leather jacket. Use the right tools and techniques to ensure that the process is done properly.
Using Harsh Chemicals
Another mistake people make is using harsh chemicals to remove patches. This can be damaging to the leather and can cause discoloration or other damage. It’s important to use gentle products that are specifically designed for leather. Avoid using bleach, ammonia, or other harsh chemicals that can cause damage.
Neglecting Leather Conditioner
Finally, many people neglect to condition their leather jacket after removing a patch. This can cause the leather to become dry and brittle, which can lead to cracking or other damage. It’s important to use a good quality leather conditioner to keep your jacket looking and feeling great. Be sure to follow the manufacturer’s instructions for best results.
Final Remarks
In this article, I covered the question of removing patches from a leather jacket, in a step-by-step and detail-oriented manner.
So if you want to detach a patch from your leather jacket, here’s a quick summary of what you need to do.
- Check how the patch has been attached to the leather.
- Apply the adhesive remover.
- Gently peel off the patch and clean the area.
- Condition the leather.

My name is Alex Higson and I am the founder of Magic Of Clothes. I have worked in the fashion industry for many years, and clothes and style are a huge part of my life.